Header Settings
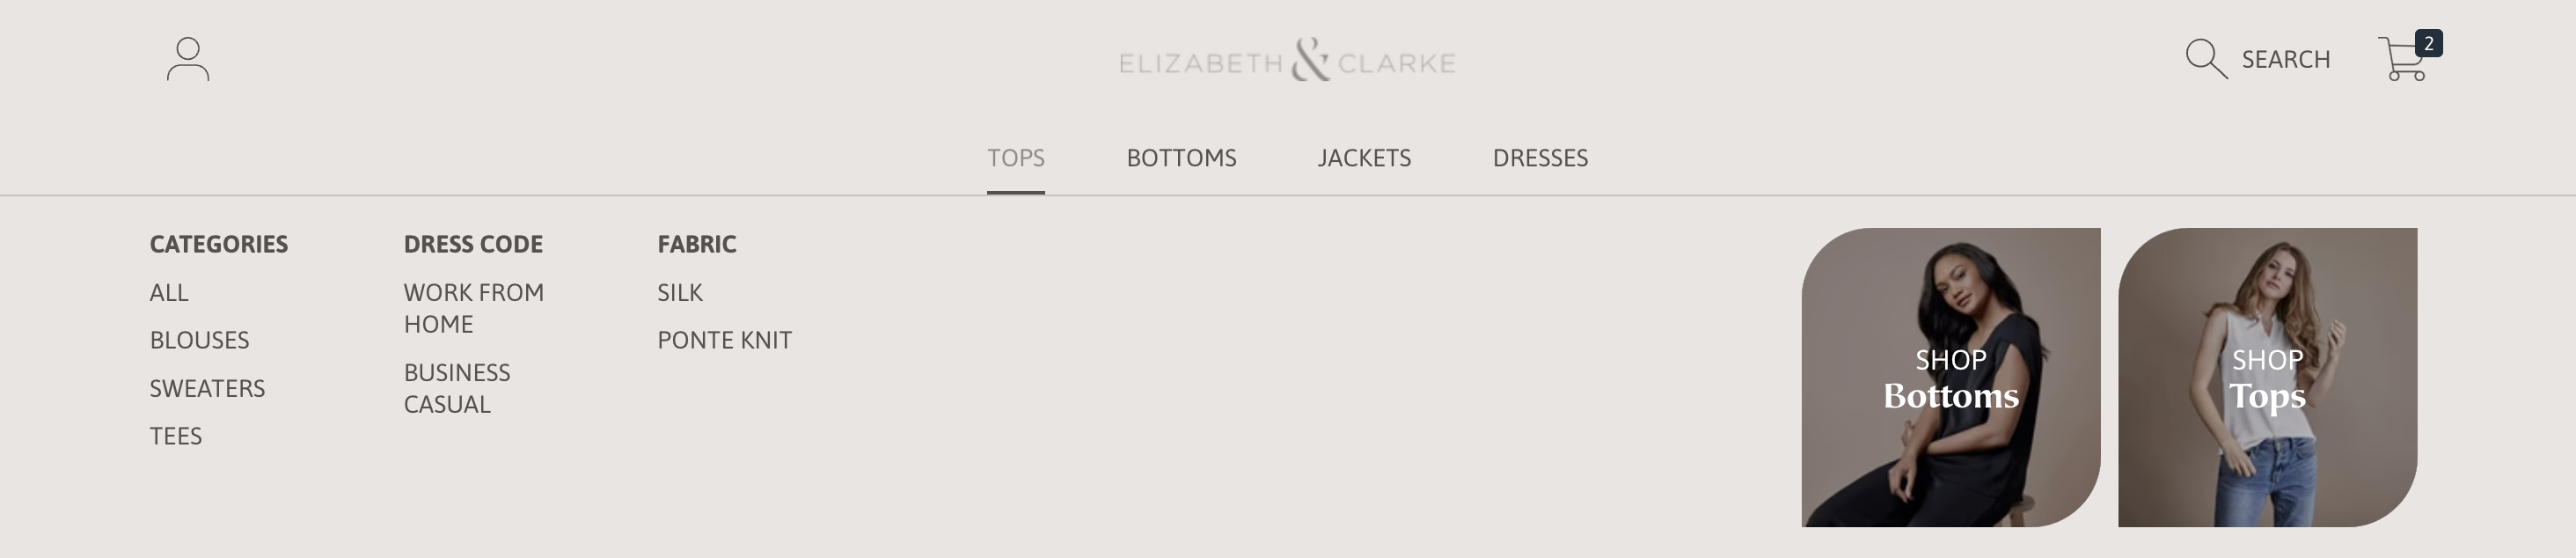
The Header contains the navigation links to your store. It also includes your logo, the search bar, the cart icon, and the login icon, if enabled. The Header renders across the top of the screen.
Frame
Set up section
- Click the Header section to open its settings in the side panel.
Logo
You will see two options in the logo settings: Logo and Logo inverse. Frame needs these two versions of the logo because the header background color changes when customers scroll down. By default, the header background changes from a dark color to a light color. If you don’t add a logo, the store name will appear by default. We recommend a PNG image with a transparent background and a minimum width of double your desired display size to accommodate retina screens.
- Under the Logo section, click Select image and use the file selector to select an image from your library or upload a new logo file. We recommend a logo with strong contrast against the background color of the Header before scrolling.

- Under the Logo inverse section, click Select image and use the file selector to select an image from your library or upload a new logo file. We recommend a logo with strong contrast against the background color of the Header while scrolling.
- Use the Custom logo width slider to make your logo larger or smaller. On mobile devices, the maximum logo width will be sized to fit the screen.
- Use the Desktop logo position selector to select the logo's position: Top center, Top left, or Middle left.

- Click Save.


Navigation
- By default, the Main Menu will be selected. If you would like to change this, click Change and then Change menu.

- The Secondary menu will only be visible on mobile devices. This menu allows the user to quick select common pages like My Account or Returns. By default, the Footer menu will be selected. This menu is optional.

- Choose the menu you want to use and click Select.
- The Highlight menu titles option is useful when you want to highlight a sale collection or an important page. Use commas to support different links (e.g. Sale, New). Please note: the menu title is case sensitive and must be written in the same case as the source menu name in your Shopify Admin.
- Use the Highlight color option picker to select the color you would like to highlight the menu titles.
- Click Save.


Frame, Madison.
Honey
Set up section
- Click the Header section to open its settings in the side panel.
Logo
You will see two options in the logo settings: Image and SVG. Adding your logo in SVG format allows you to change the logo's color dynamically based on the background color of the page while an image will not have this flexibilty. If you don’t add a logo, your store name will appear by default.
-
If you are using an image, click Select image and use the file selector to select an image from your library or upload a new logo file. We recommend using PNG format with a transparent background and a minimum width of double your desired display size to accomodate retina screens. We recommend a logo color with a strong contrast against the background color of the Header.

- If you are using an SVG format logo, Honey will change the color automatically based on the header background color. To learn more about this option please visit SVG logo.
- Use the Custom logo width slider to make your logo larger or smaller. On mobile devices, the maximum logo width will be sized to fit the screen.
- Click Save.
Layout
-
Use the Header layout dropdown to adjust the placement of elements on your header. Honey offers the following options:

Logo left, menu left 
Logo left, menu center 
Logo center, menu left 
Logo left, menu below 
Logo center, menu below The layout is automatically optimized for mobile.
- When the Enable sticky header option is active, the header will be visible on the screen as customers scroll up.
- If you would like to change the color of the Header, use the Color scheme dropdown to select the text and background color of the Header. If the sticky header is enabled, the background color will only apply on scroll.
- If you want to apply the color scheme before scroll when the sticky header is enabled, click Apply color scheme before scroll.
- If you would like to add a frosted glass effect to your header, click Enable frosted glass background to activate this. If the sticky header is enabled, the frosted glass background will only appear on scroll.


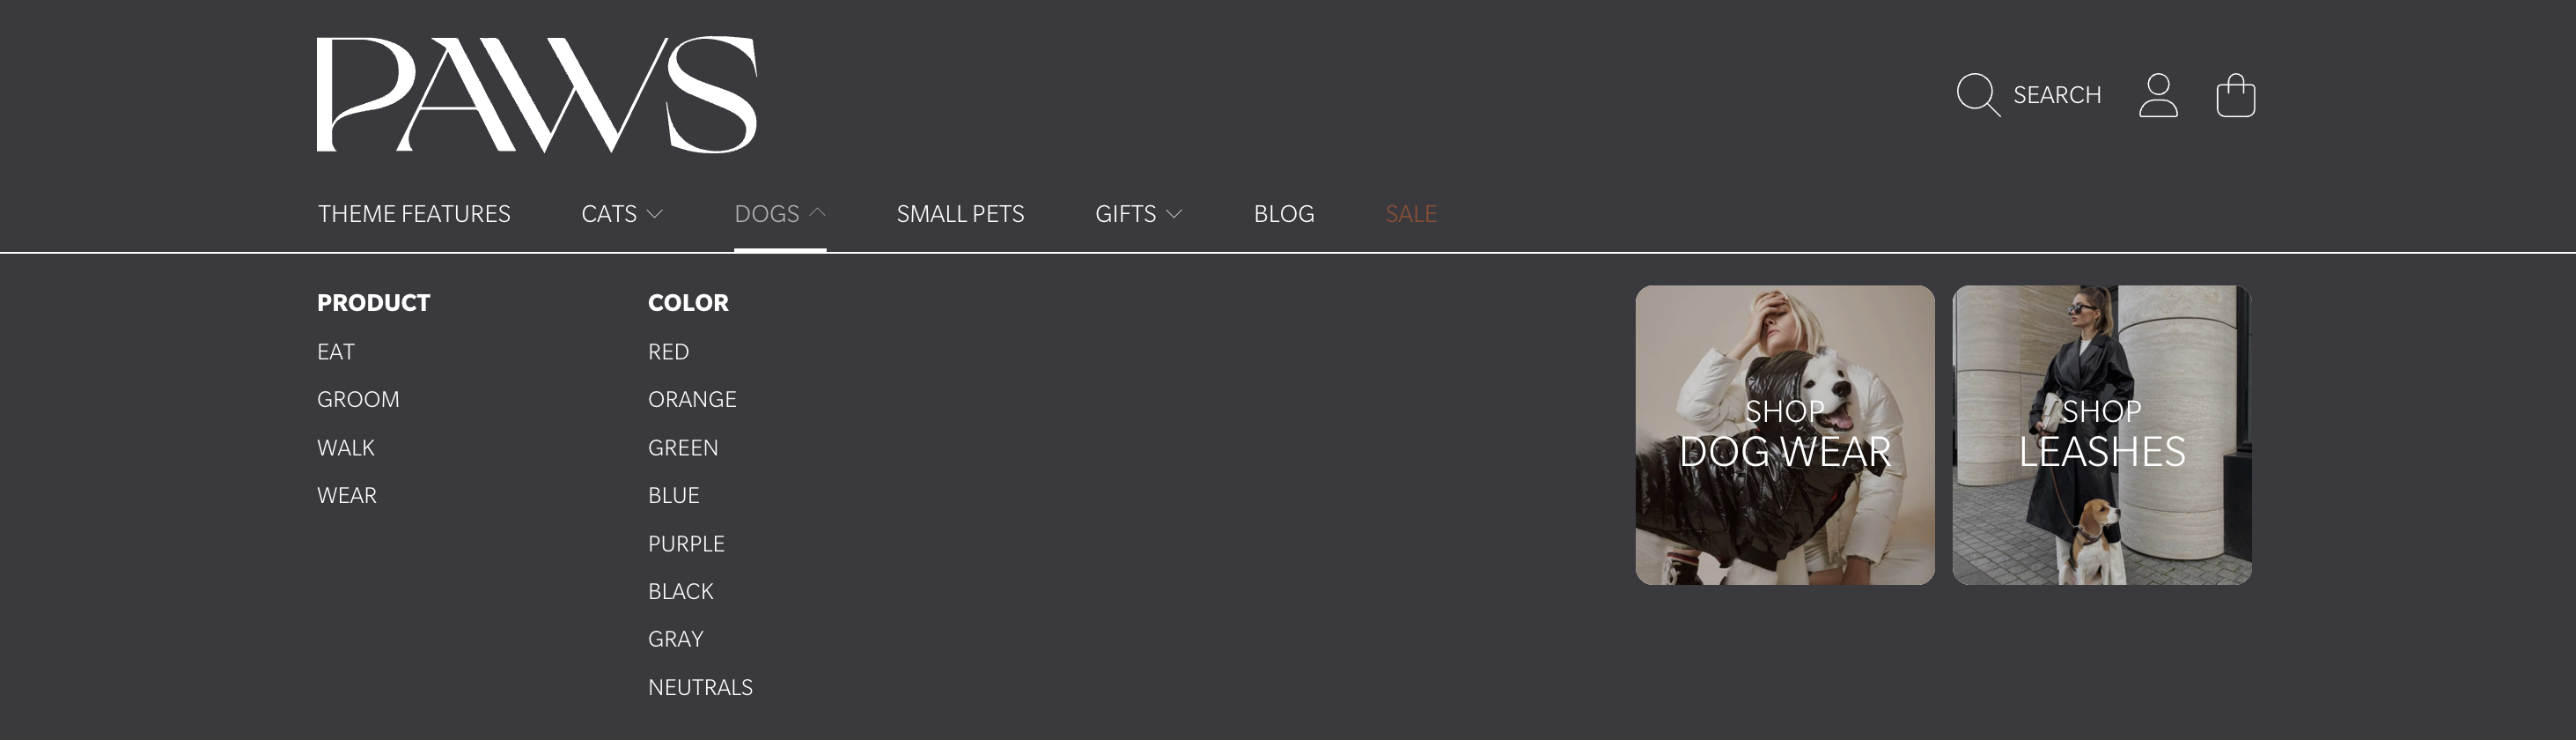
Menu
-
By default, the menu selected will be the Main Menu. To change this, click Change and select the menu you would like to show.

- The Secondary menu is only visible on mobile devices and allows the user to quick select common pages like My Account or Returns. By default, the menu selected will be the Footer. This menu is optional.
- If you would like to change the shape of the of the header background, use the Submenu background option to choose the shape you want applied. Please note this shape will be only be visible when you have a dropdown menu with nested menu links.
- If you would like to change the submenu column spacing you can use the Submenu spacing slider to make your columns larger or smaller, this setting is useful if you have long submenu names. This setting only applies to desktop devices.
- On touch devices, we change the color of the active menu to indicate to the user which menu is active. You can choose the active menu color by clicking on the Active menu color picker and selecting a color.
- To highlight a sale, promotion, or important page, type the menu title into the Highlight menu titles field. Use commas to support different links (e.g. Sale, New). Please note: menu titles are case sensitive and must be written in the same case as the source menu title in your Shopify Admin.
- Use the Highlight color option picker to select the color you want to use to the highlight the selected menu items.
- Honey offers the ability to add icons or images to dropdown submenu items. Please visit Menu icons to learn how to set this up. Use the Menu icon size slider to make your icons larger or smaller.
-

Custom menu icons

Typography
- Use the Heading font options to choose the typeface you want to apply on the header: Heading, Body, Button, or Accent. You can change the source typefaces in your Theme Settings.
- Click Save.
Transparent Header
Honey offers the option to enable a transparent header on your home page. Please note, this option is only available when either the Hero image section or Hero video section is the first section on the page. To enable, please follow these instructions:
- Make sure your first section after the Header is either Hero image or Hero video.
- In the side panel, click into the Hero image or Hero video section settings.
- Find the Allow transparent header option and check or uncheck this option to enable or disable the transparent header.
Honey, Noteable, Maravella, Roadster, Treasure.